この記事は、Flutter公式サイトにある4つあるTutorialの中の Building layouts を行った際に学んだことをメモしたものです。
完成画面
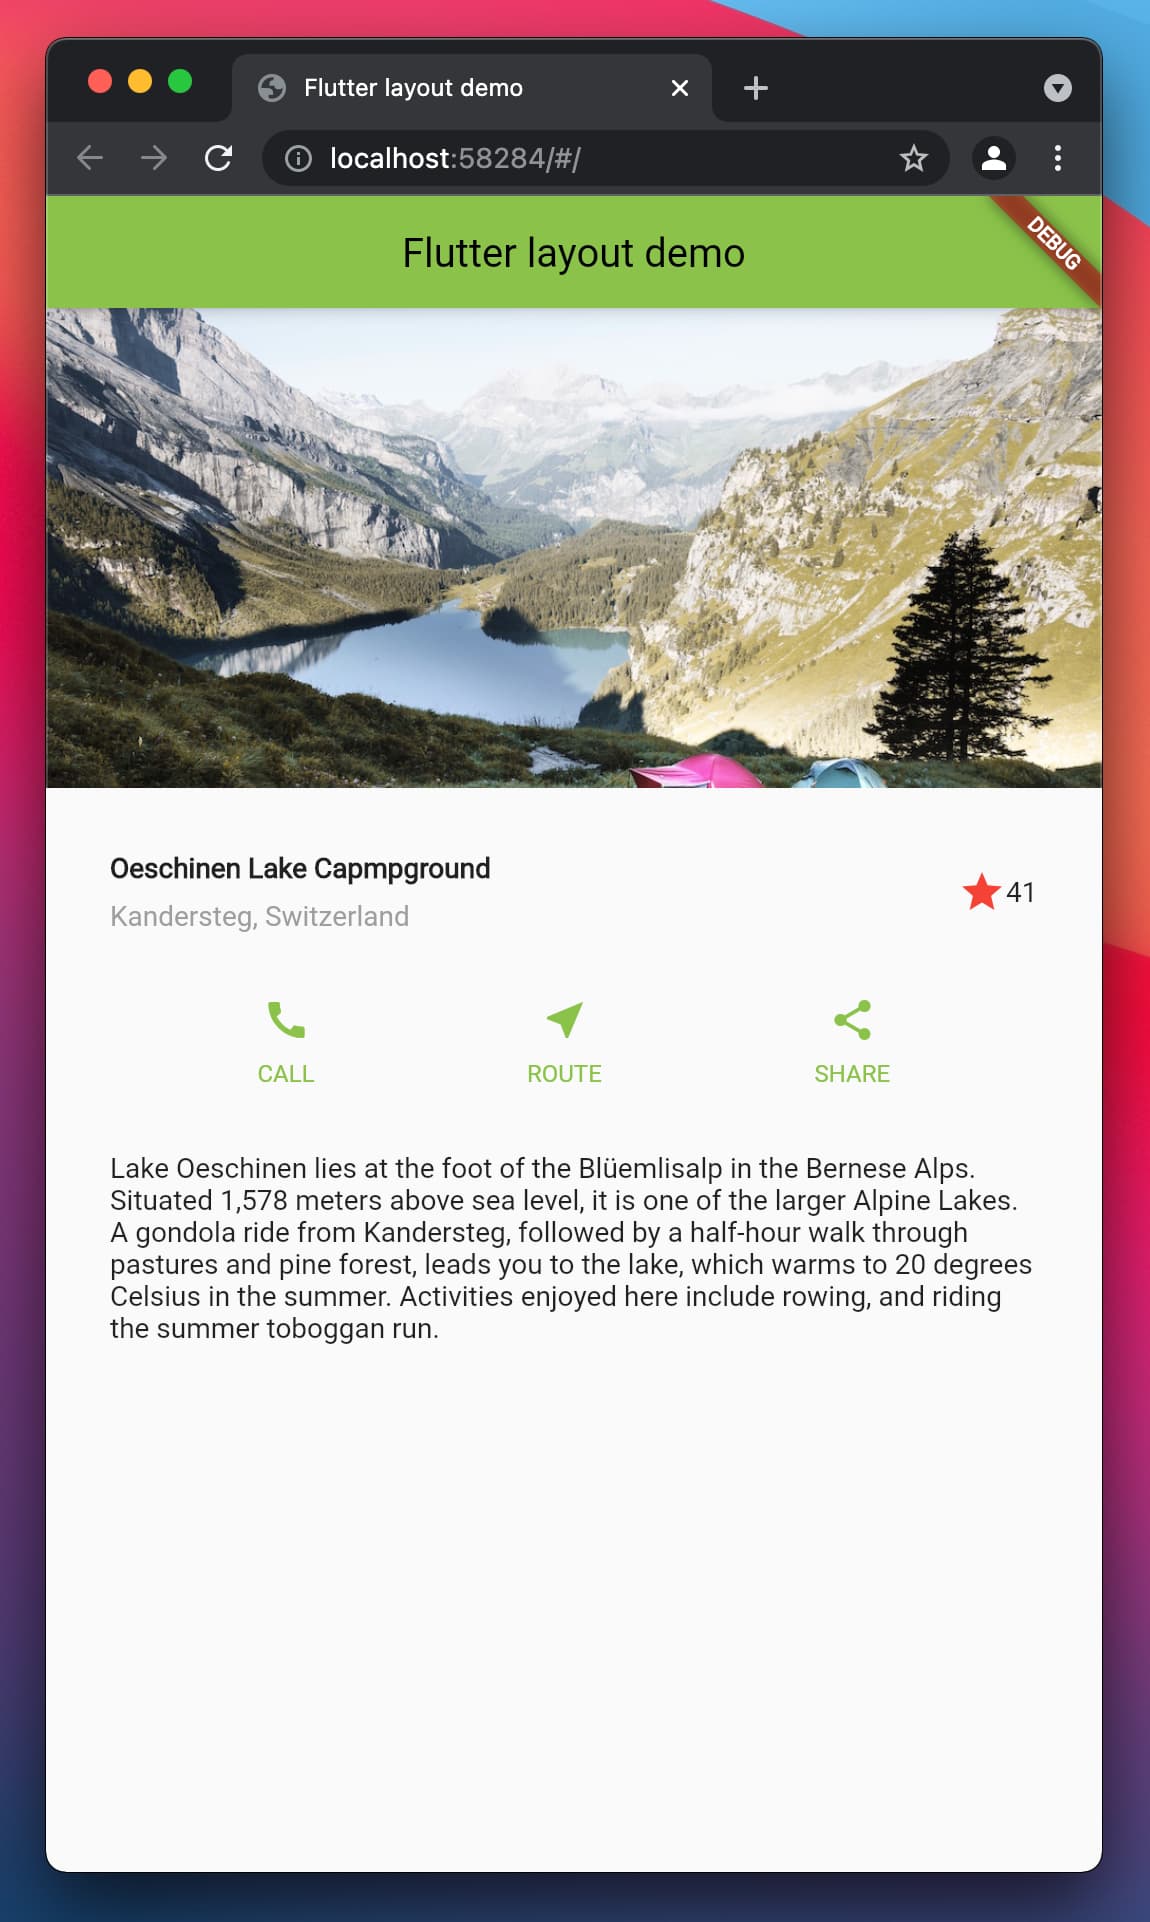 タイトルやアイコン部分の色は、Tutorialでは青色なのですが、緑色に変更しています。
Step 1: Diagram the layout
作成する画面がどのような構成になっているかを解説してくれているので、コードを書くときにどの要素に対応しているかがスムーズに理解できました。
Step2: Implement the title row
該当コード
Widget titleSection = Container(
    padding: const EdgeInsets.all(32),
    child: Row(
      children: [
        Expanded(
          // Expandedを使用することで空いた空間を埋めてくれる
          child: Column(
            crossAxisAlignment: CrossAxisAlignment
                .start, // Columnのcrossなので横軸を指定 Rowでcrossにした場合、縦軸になる
            children: [
              Container(
                // 1つ目の要素をContainerを使用することでpaddingを使えるようにする
                padding: const EdgeInsets.only(bottom: 8),
                child: const Text(
                  "Oeschinen Lake Capmpground",
                  style: TextStyle(fontWeight: FontWeight.bold),
                ),
              ),
              Text(
                "Kandersteg, Switzerland",
                style: TextStyle(color: Colors.grey[500]),
              ),
            ],
          ),
        ),
        Icon(
          Icons.star,
          color: Colors.red[500],
        ),
        Text("41"),
      ],
    ),
);
- Expanded()
- Container()
- crossAxisAlignment
上記3つについてを追加で調べました。
Expanded()
これでラップすることで、余白を埋めてくれます。
こちらの記事の解説がわかりやすかったです。
Container()
Containerでラップすることで、paddingやmarginを指定するようにしています。
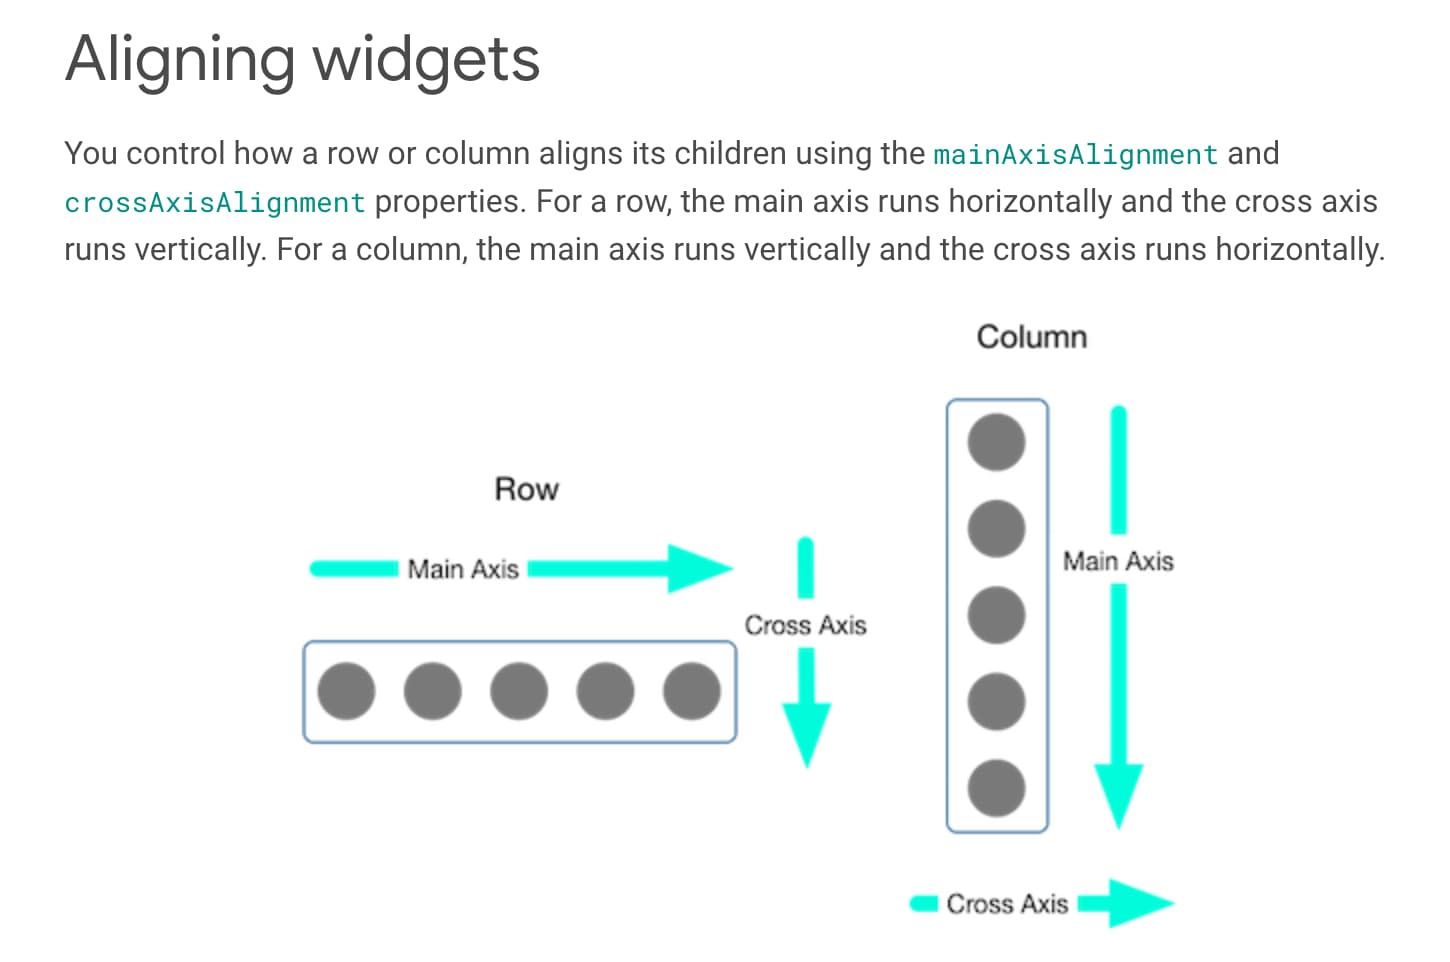
crossAxisAlignment
crossAxisAlignmentとmainAxisAlignmentがどう違うのかを追加で調べました。
これに関しては、公式Docsの画像を一目見るだけで解決しました。
Step 3: Implement the button row
該当コード
  Widget buttonSection(Color color) {
    return Row(
      mainAxisAlignment: MainAxisAlignment.spaceEvenly,
      children: [
        _buildButtonColumn(color, Icons.call, "CALL"),
        _buildButtonColumn(color, Icons.near_me, "ROUTE"),
        _buildButtonColumn(color, Icons.share, "SHARE"),
      ],
    );
  }

  Column _buildButtonColumn(Color color, IconData icon, String label) {
    return Column(
      mainAxisAlignment: MainAxisAlignment.center, // Columnのmainなので縦軸を中央にもってくる
      mainAxisSize: MainAxisSize.max, // このColumnを配置した後の親要素の空白をなくす
      children: [
        Icon(
          icon,
          color: color,
        ),
        Container(
          margin: const EdgeInsets.only(top: 8),
          child: Text(
            label,
            style: TextStyle(
                fontSize: 12, fontWeight: FontWeight.w400, color: color),
          ),
        )
      ],
    );
  }
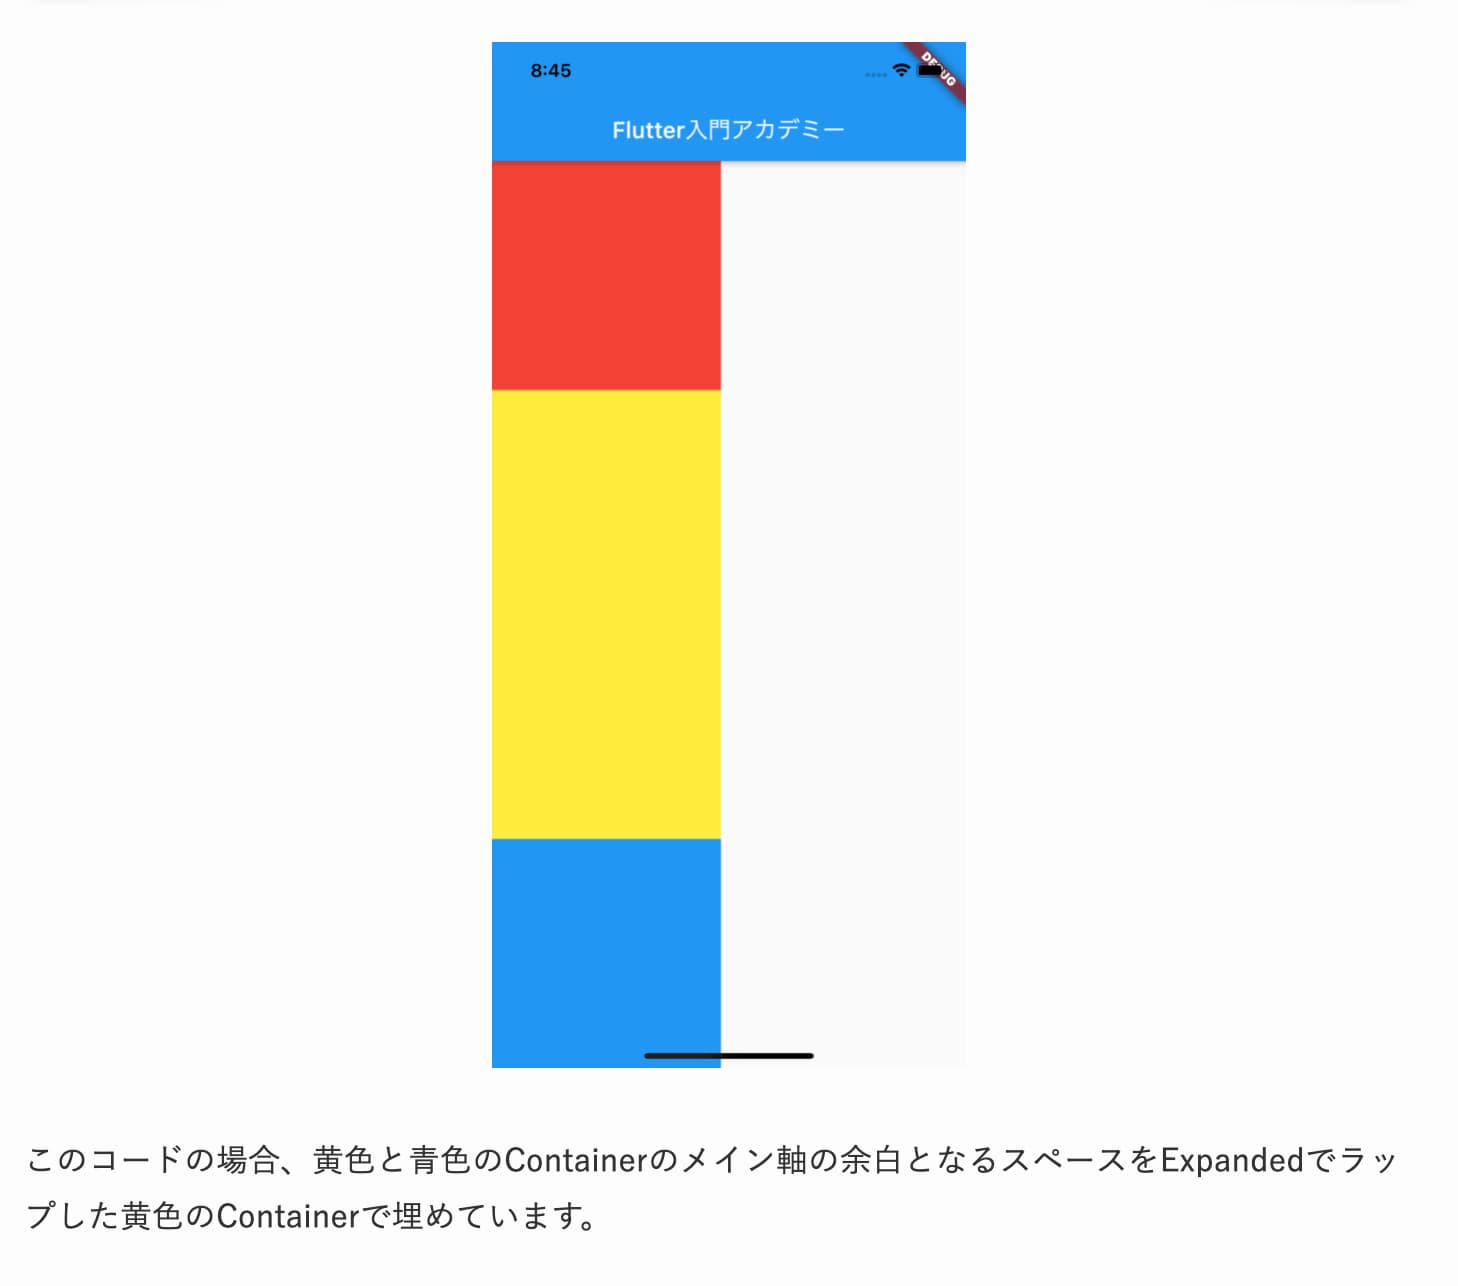
このステップでは、mainAxisSizeについて調べました。
こちらの記事で実際に動きを確認できました。
Step 4: Implement the text section
該当コード
  Widget textSection = const Padding(
    padding: EdgeInsets.all(32),
    child: Text(
      'Lake Oeschinen lies at the foot of the Blüemlisalp in the Bernese '
      'Alps. Situated 1,578 meters above sea level, it is one of the '
      'larger Alpine Lakes. A gondola ride from Kandersteg, followed by a '
      'half-hour walk through pastures and pine forest, leads you to the '
      'lake, which warms to 20 degrees Celsius in the summer. Activities '
      'enjoyed here include rowing, and riding the summer toboggan run.',
      softWrap: true, // 折り返してテキストを表示
    ),
  );
softWrapがfalseだと、一行で表示されてしまい、画面に収まらなくなります。
Step 5: Implement the image section
該当コード
pubspec.yaml
name: hello_world
description: A new Flutter project.

publish_to: 'none'

version: 1.0.0+1

environment:
  sdk: ">=2.12.0 <3.0.0"

dependencies:
  flutter:
    sdk: flutter

dev_dependencies:
  flutter_test:
    sdk: flutter

flutter:
  uses-material-design: true
  # ↓を追加
  assets:
    - images/lake.jpg
children: [
  Image.asset(
    'images/lake.jpg',
    width: 600,
    height: 240,
    fit: BoxFit.cover,
  ),
  titleSection,
  buttonSection(color),
  textSection
],
Step 6: Final touch
該当コード
class _MyHomePageState extends State<MyHomePage> {
  @override
  Widget build(BuildContext context) {
    Color color = Theme.of(context).primaryColor;

    return Scaffold(
      appBar: AppBar(
        title: Text(widget.title),
      ),
      body: ListView(
        // ListViewにすることで縦のサイズが足りなくてもスクロールで表示できるようになる
        children: [
          Image.asset(
            'images/lake.jpg',
Columnだと、画面の縦の長さが小さい場合最後まで要素が入らないため、ListViewにしています。
最後に
英語が得意ではないので進みはゆっくりですが、とても充実したTutorialが用意されており最高です。Tutorialsはまだあるので残りも進めようと思います。